Five Inversion Postures from the Ashtanga- Vinyasa Series with Technique
By Himanshu JoshiYogaashtangayoga, shirshasana, vinyasaclass, yoga

1. Shirshasana – Shirshasana has 13 vinyasas. To perform this sit on your knees as you do puraka and then put your elbows on the ground in front of you making sure the elbows are roughly shoulder-distance apart. Then interlock your fingers together. Then after doing rechaka and puraka put the crown of your head in front of your palms. The palms should provide a cushion for the back of your head. Then do rechaka and puraka again as you straighten and start lifting your feet. The Feet should be together. Slowly, lift your feet off the ground by taking the support of your upper body and shoulders. Make sure your spine is straight as you lift your feet up and keep your toes pointing upwards. Continue doing rechaka and puraka slowly while you are on your head. Shirshasana is also known as headstand pose but the idea here is to not put pressure on your head but instead lift with your shoulder strength so you don’t strain your neck muscles or injure your head.
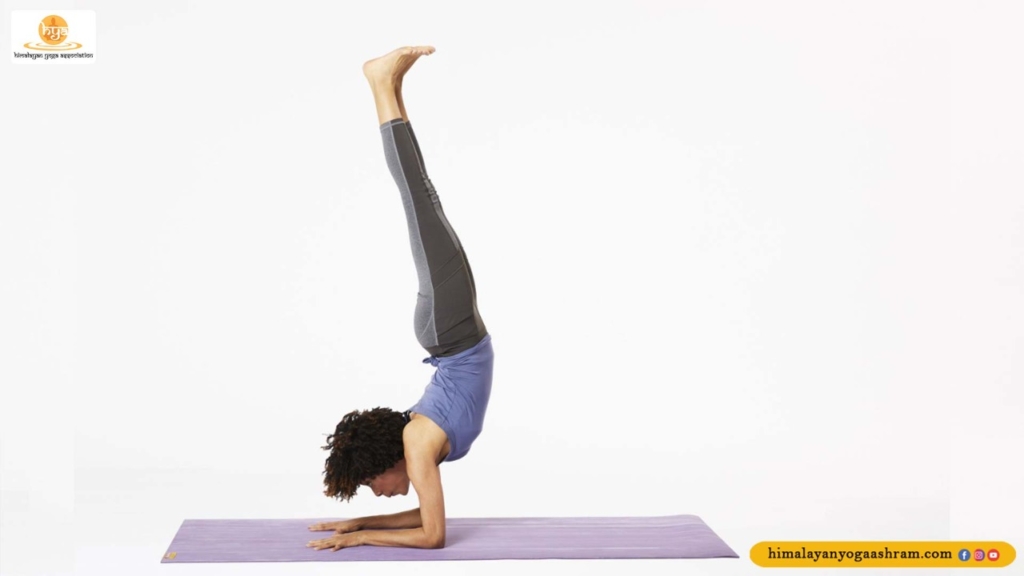
2. Pincha Mayurasana – This inversion is the next step in practice after mastering Shirshasana. In this inversion, only the forearms until the elbow are on the ground while the rest of the body is inverted. To begin put your knees on the ground as you do puraka and then put your arms and elbows on the ground in front of you. While doing rechaka and puraka slowly start lifting your knees up and straightening your feet, the toes are still on the ground like in the plank. Continue doing rechaka-puraka as you kick one leg up and try to keep your balance as you lift the other leg up as well. Slowly do rechaka-puraka in this position and bring your feet back down slowly when ready, then bring your knees down as well to get out of the pose.
Sarvangasana
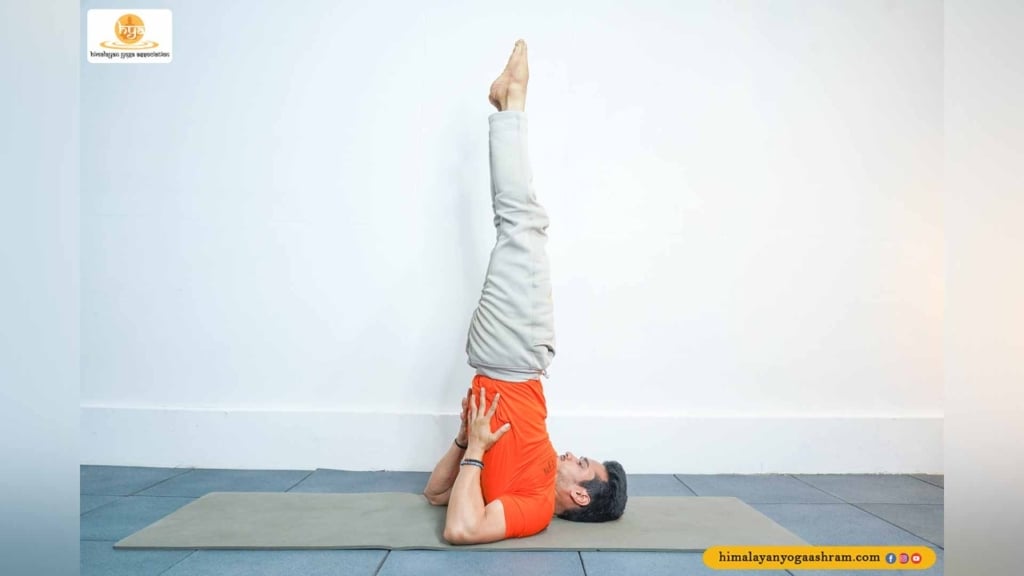
3. Sarvangasana – To begin lie down straight with arms on side of the body, take a few deep breaths by doing rechaka-puraka, and then slowly begin to lift the feet up. Keep the feet together. Bring the feet further up as in halasana and then prop your hand on your back with elbows on the ground as you straighten the legs and toes point up. Continue doing rechaka-puraka slowly. Make sure the spine is straight and your gaze is towards the sky.
4. Salamba Shirshasana – This pose is a variation of Shirshasana and is also known as a tripod headstand cause the arms look like a tripod balancing the body. To begin, just like Shirshasana sit with knees close and put your arms in front of you while doing rechaka-puraka. After that place the top of the head in between the arms and start lifting the knees off the ground while doing rechaka-puraka. Slowly lift the entire feet off the ground and bring them upwards like in a Shirshasana. Keep the feet together and toes pointing up. Here the arms will support the entire body while holding the inversion so it’s important to have strong arms and shoulders. If a beginner then it is advised to use cushions to support the head and doing this pose against a wall so that any injuries can be prevented.
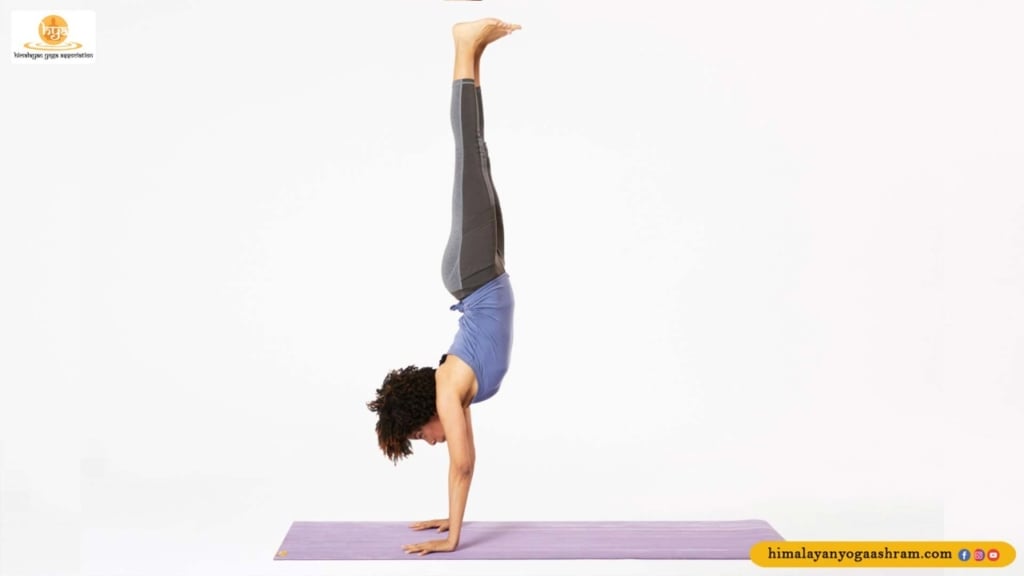
5. Adho Mukha Vruksasana – This pose is one of the challenging inversions as only the palms of the hands supports the entire body when inverted. Hence, it is also known as handstand. To begin, from Padamghustasana in surya namaskar, keep your arms in front while in a forward fold and kick one leg at a time till it feels comfortable to lift the other leg as well so that only your arms are on the ground. Do rechaka-puraka slowly while in the pose and slowly bring your feet back on the ground.
Top Related Post