10 Yoga Poses That Will Bring Full Body Strength & Balance
By Himanshu JoshiYogaA few days into practicing standing yoga poses and you find your muscles toned up and the body parts more flexible. With regular practice, your body will be prepared to do advanced asanas in no time. In most yogic traditions, standing poses form the core part of it as they bring the required strength in the body to progress on the path of self-discovery.
To be sure, yoga has a holistic approach towards health, and missing even one aspect means the journey is incomplete. This is the reason there are specific asanas to deal with specific body parts before a seeker moves on to Pranayama, the fourth limb of Ashtanga yoga.
The complete bouquet of asanas includes standing poses, hip openers, twisting, back-bending, and balancing among others. Their regular practice has immense physical, mental, and spiritual benefits. It is always advisable to practice the asanas under the guidance of an experienced yoga teacher to ensure the right alignment, angle and right balancing.
Compared to other asanas, standing yoga poses are generally held for a shorter duration of 2-4 breaths. Together with slow and steady breathing, they immensely benefit the learners and prepare them well for the advanced stage. Standing poses significantly improves the balance in the body and strengthen all the muscles. Joints get smooth and add to the flexibility. Both lower and upper body parts get strengthened and the practitioner feels better balance across various body parts.
In the case of some standing asanas, poses get repeated and it is pertinent to perfect them for avoiding the risk of injury later on. For example, in Surya Namaskar (Sun salutation) various poses get repeated, and hence it is important that the alignment is right. Doing asanas with incorrect alignment could have a disastrous impact in the long run and hence should be done rightly from the beginning itself. Along with right alignment, the gaze should also be perfect for understanding the body and getting desired results.
There are dozens of standing poses such as Triangle pose and Warrior pose which are practiced across various styles and yogic traditions. Here are 10 standing yoga poses you can try and reap great benefits from:
Tadasana (Palm Tree or Mountain pose)
This is one of the great asanas to improve posture and is considered a foundation for all standing asanas. While it is used as a preparatory pose for many other standing asanas, it is also done to improve body alignment and balance. Tadasana improves stability in the body and clears congestion in the spinal nerve. Regular practice makes thighs, legs, and ankles strong. It also helps in increasing height at an early age.
Step-by-step method:
- Stand with the feet two inches apart and spine straight. The weight should be balanced on the two legs evenly.
- Interlock the fingers of the hand and turn the wrist outward.
- Then, come on your toes and balance the body.
- With arms up over the head, inhale and stretch the wrist outward.
- Stay in the position for 20-30 seconds.
- Exhale and put the heels down. Release the interlock of fingers and arms. Come back to the normal standing position.
- Repeat the asana for 5-7 times.
Konasana (Angle pose)
The asana is very effective in reducing side fats and helps tone up the muscles of arms, legs, and abdominal organs. It also stretches the spine and relieves back pain. It also improves immunity and digestion. If you joined the weight loss program and are not happy with the results then you can try Konasana for a reduced waistline. This posture stretches
and contracts the muscles of the thoracic region of the body thus strengthening it. Konasana has two variations — Konsana-I and II.
Konasana-I
Step-by-step method:
- Stand straight with chin parallel to the floor
- Keep the feet 24-36 inches apart.
- Now, inhale and bend the upper part of the body to the right.
- Slide the right hand towards the knee and left-hand fingers towards the chest
- Remain in this position for 5-6 seconds retaining the breath
- Exhale and come back to the starting position
- The same should be repeated by changing the side to make one round of Konasana-I.
Konasana-II
- Stand straight with the breath relaxed
- Keep the feet 24-36 inches apart
- Breathe in and gently lift both arms up over the head
- Bend the upper part of the body to the right sliding the hand towards the right knee
- Experience the stretch in the spine
- Come back to the starting position
- Repeat the same for the left side as well
The two variations of the angle pose improve the functioning of the respiratory system and improve blood circulation in the body. Regular practice makes the spine more flexible and revitalizes the body.
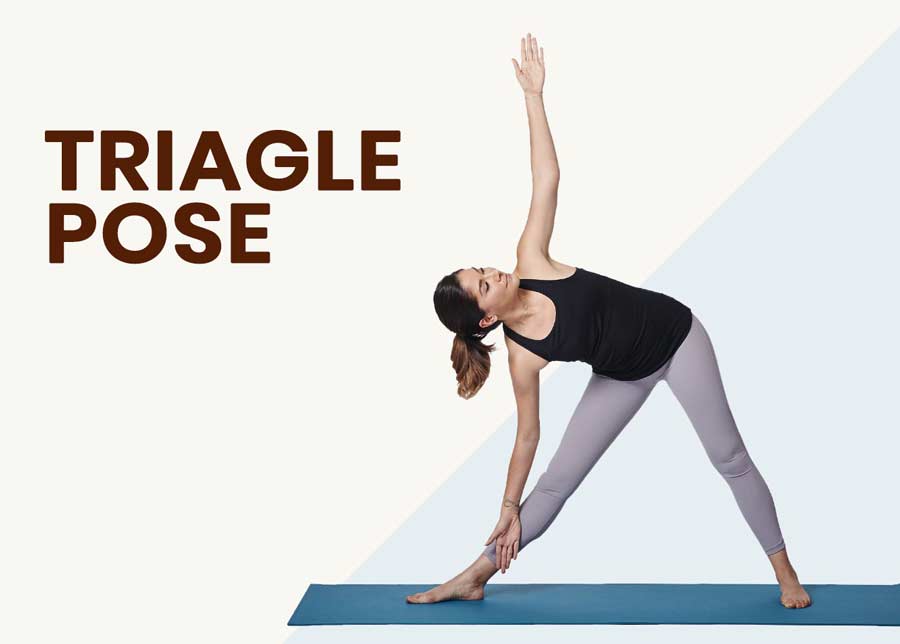
Trikonasana or the Triangle pose
As the name suggests, the asana forms a perfect triangle. Trikonasana strengthens ankles, knees, and other joints and stretches the neck, spine, legs making the body flexible. It also helps in improving balance and stability. The asana is good for your digestive health and alleviates stress. In the case of beginners, Trikonasana must be done slowly to avoid any injuries or pain and some warm-up exercise must be done to prepare the body for bending and stretching.
Step-by-step method
- Stand straight with your feet apart (around 3 feet)
- Inhale and bring your arms sideways to the shoulder level
- Move your right foot towards the right side
- Exhale and bend the body to the right with the right hand towards the floor and left hand upwards
- The left arm should be in a straight line with the right one
- Hold this posture for a couple of seconds
- Repeat from the other side
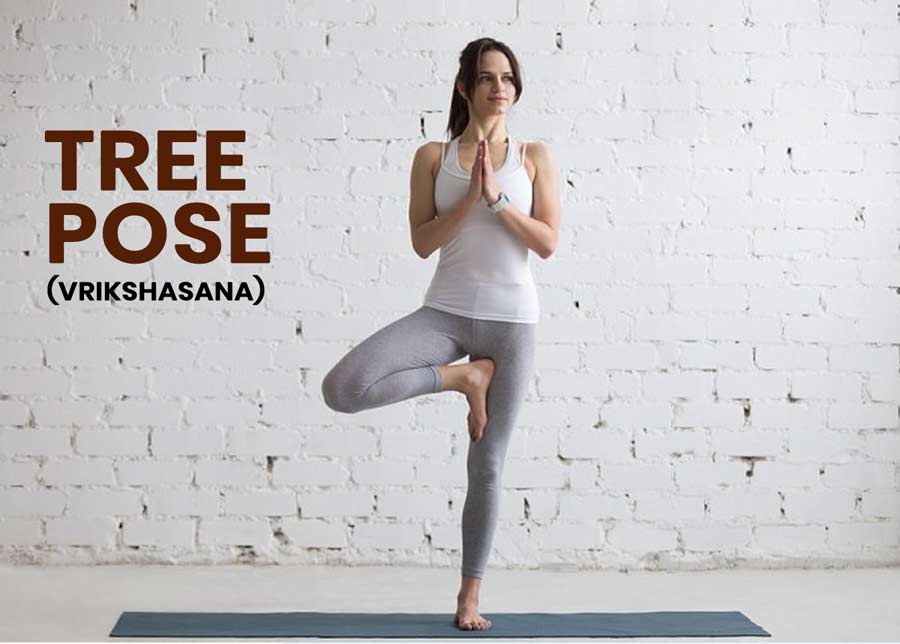
Vrikshasana (Tree Posture)
Vrikshasana is all about balance and stability of body and mind. While standing in this graceful state of a tree helps one achieve balance, coordination, and endurance in the body. It also strengthens the leg muscles, tendon of the feet, and muscles around the buttocks among other things. Vrikshasana improves posture and also helps in improving neuromuscular coordination. It builds your self-esteem, confidence and boosts your concentration. It takes a while for your body to be prepared for Vrikshasana and you may do a few rounds of Tadasana as a preparatory pose.
Step-by-step method
- Stand with feet at least around 2 inches apart
- Bend the right leg and place the right foot on the inner side of the thigh
- Raise the arms up and join the palms together
- Hold the asana for 10-30 seconds
- Bring the arms down and release the right leg slowly
- Repeat the asana from the other side.
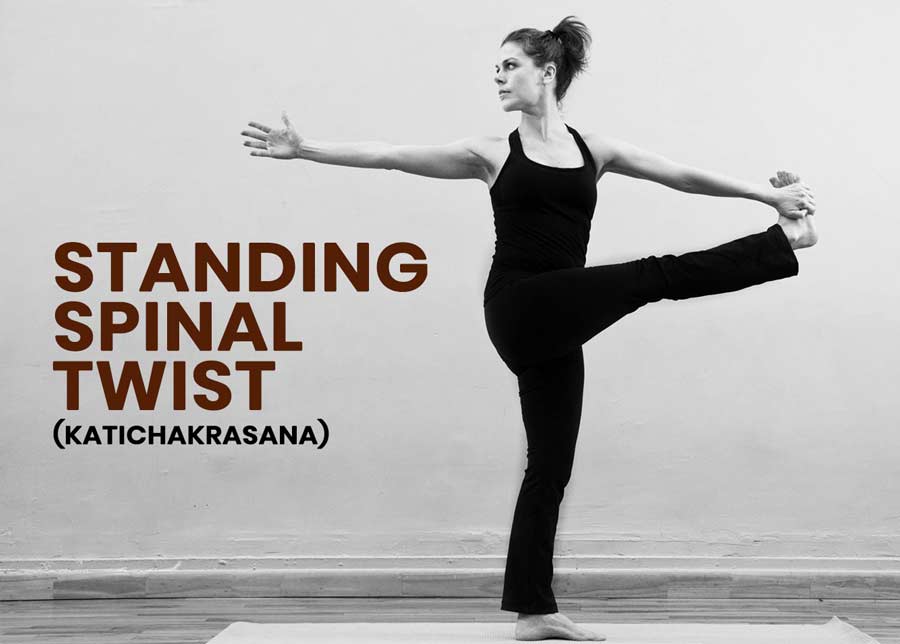
Katichakrasana (Standing Spinal Twist)
Kati means waist, chakra means wheel and asana means posture. The asana strengthens and makes your waist, spine, arm and leg muscles flexible. Fit for those leading a sedentary lifestyle, the asana can be done by people of any age-group conveniently and quickly. The asana may appear relatively easier but should not be done with a jerk to avoid any injury. Do it slowly as you breathe naturally for maximum benefits.
Step-by-step method
- Stand straight with your feet together
- Breathe in and stretch your hands forward with your palms facing each other
- Move your waist to the right and look back over the right while keeping your feet at the same place
- Come back to the original position
- Now do the asana from the other side
Veerbhadrasana 1 (Warrior Pose 1)
The word warrior in Veerbhadrasana 1 (Warrior Pose 1) denotes spiritual warrior who fights against self-ignorance. The asana is all about getting your angles right and ensuring enough stretching for strengthening the shoulders, arms, legs, hips muscles. The asana also helps energising the body and if you lead a sedentary lifestyle, it can benefit by opening hip. The pose is also recommended for treating sciatica pain.
Step-by-step method
- Stand with your feet 4 feet apart
- Bring your arms over your head and join your palms
- Turn your right foot outwards at Right angle
- Turn the left foot slightly inwards
- Bring your torso to the right keeping the arms straight
- Bend the right knee in such a way so that the right thigh is parallel to the ground
- The left leg remains stretched out and constant during the pose
- Look up towards your palms
- Hold the position for up to 30 seconds
- Repeat from the other side
Veerbhadrasana 2 (Warrior Pose 2)
Warrior pose II may appear a little challenging for beginners but as days pass and practice becomes intense, it becomes easy and one enjoys repeating the pose. It opens hips and shoulders stretching thighs and chest. Warrior pose II makes legs and arms strong. The asana is recommended to those at the risk of osteoporosis and sciatica. Regular practice brings a lot of stamina and vitality in the body. Soon, signs of stability are visible. Veerbhadrasana 2 improves blood circulation and respiration. It has many emotional benefits too. Regular practice brings glow on the face and confidence level multiplies over time. Body weight should be evenly distributed over the feet and those suffering from knee pain should avoid this asana.
Step-by-step method
- Stand in Tadasana or Mountain pose.
- Keep the feet almost two feet apart from each other
- Then turn your right feet out towards the right side of the mat
- Now, bend down towards the right making 90 degree angle
- Keep your other leg straight and parallel to the floor
- Bring your arms parallel to the floor with palms facing downward
- Hold the pose for 10-15 seconds and then repeat the asana on the other side
Padahastasana (Hands to Feet posture)
Padahastasana or hand to foot pose is one of the steps in Surya Namaskar. It improves alignment and bring flexibility across the body especially calves and hamstrings. It strengthens spinal nerves and adds to the vitality. Padahastasana releases excess vata from the abdomen and strengthens digestive organs thus improving metabolism. It also prevents constipation. It also helps in increasing concentration.
Step-by-step method
- Stand straight with feet around 2 inches apart
- Inhale slowly and bring your arms up
- Stretch the body up from the waist
- Exhale and bend forward and bring your palms to touch the ground
- During the asana ensure that your back stays as straight as possible
- Hold the position for 10-30 seconds
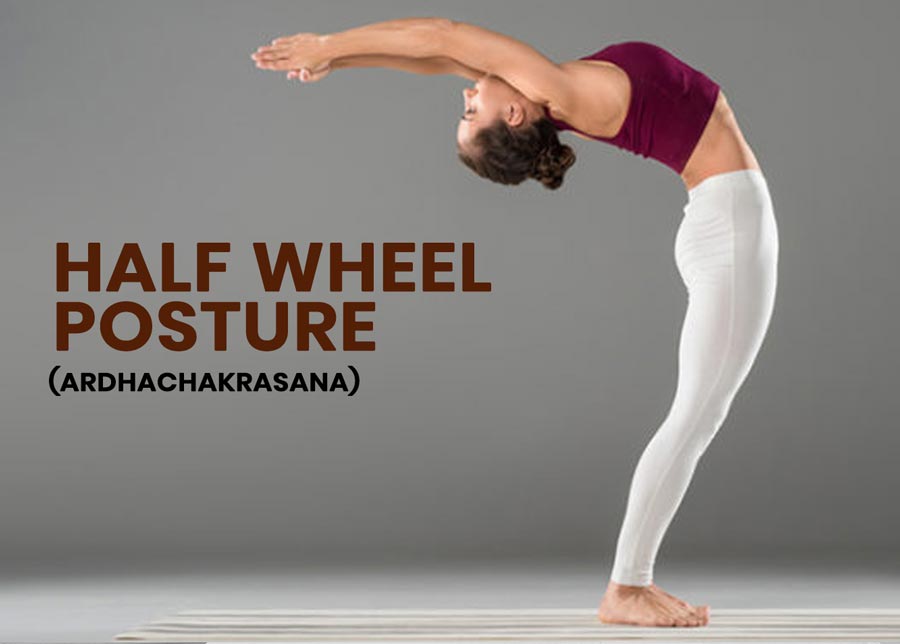
Ardhachakrasana or the Half Wheel posture
Yoga poses are not only good for overall health but also improves body’s ability to heal itself. Ardhachakrasana or half-wheel pose has a lot of benefits especially upper body part and tones up the shoulder muscles. It opens the chest and back-ward bending makes the spine flexible. Relatively an easy posture, Ardhachakrasana is very effective in back pain and respiratory disorders. It reduces thigh and belly fat. Lung capacity also increases following regular practice. It has been quite effective in controlling blood sugar. The half wheel pose stimulates abdominal organs.
Step-by-step method
- Stand straight
- Hold your waist with fingers as to support your back
- Keep your elbows parallel to the ground
- Now bend your head backwards
- Now bend backwards from the lumbar region and relax
- Hold the position for 10-30 seconds
Utkatasana or Chair Pose
Utkatasana or Chair pose strengthens thighs, ankles and shoulders. It generates a lot of heat in the body and improves metabolism. Beginners or obese people may find it difficult in the beginning but practice for a week or two makes the pose gradually easy. Chair pose opens the chest and standing in the pose for a few breaths increases heart rates and improves blood circulation. Digestive organs also get strengthened. It builds stamina across the whole body and removes lethargy. Utkatasana is a powerful pose which tones the nervous system and brings confidence on the face.
Step-by-step method
- Stand straight
- You must put equal weight on both legs as to strike a perfect balance
- Slowly bend your back as if sitting on a chair without actually using one
- Don’t do it with a jerk and keep your movements slow
- Hold it for 10-15 seconds
- Repeat the asana for 4-5 times